Motion Blur Magic: Enhancing Your Timelapse with Creative Techniques
So you’ve mastered the basics of timelapse photography and are ready to take your skills to the next level. Creating stunning motion blur effects is a great way to make a memorable timelapse sequence. When done right, motion blur can add drama, enhance the perception of speed, and make your subject come alive. The key is using the right techniques to capture and blend
So you’ve mastered the basics of timelapse photography and are ready to take your skills to the next level. Creating stunning motion blur effects is a great way to make a memorable timelapse sequence. When done right, motion blur can add drama, enhance the perception of speed, and make your subject come alive. The key is using the right techniques to capture and blend multiple frames over time.
In this article, we’ll show you how to harness the power of motion blur to transform your timelapses into cinematic works of art. You’ll learn which camera settings work best for motion blur, how to capture the perfect blend of sharp and blurred frames, and advanced post-processing techniques to make the movement really pop. Get ready to take your viewers on a visual thrill ride and bring your timelapses to life with the magic of motion blur!
Creating Motion Blur in Your Timelapses for a Magical Effect
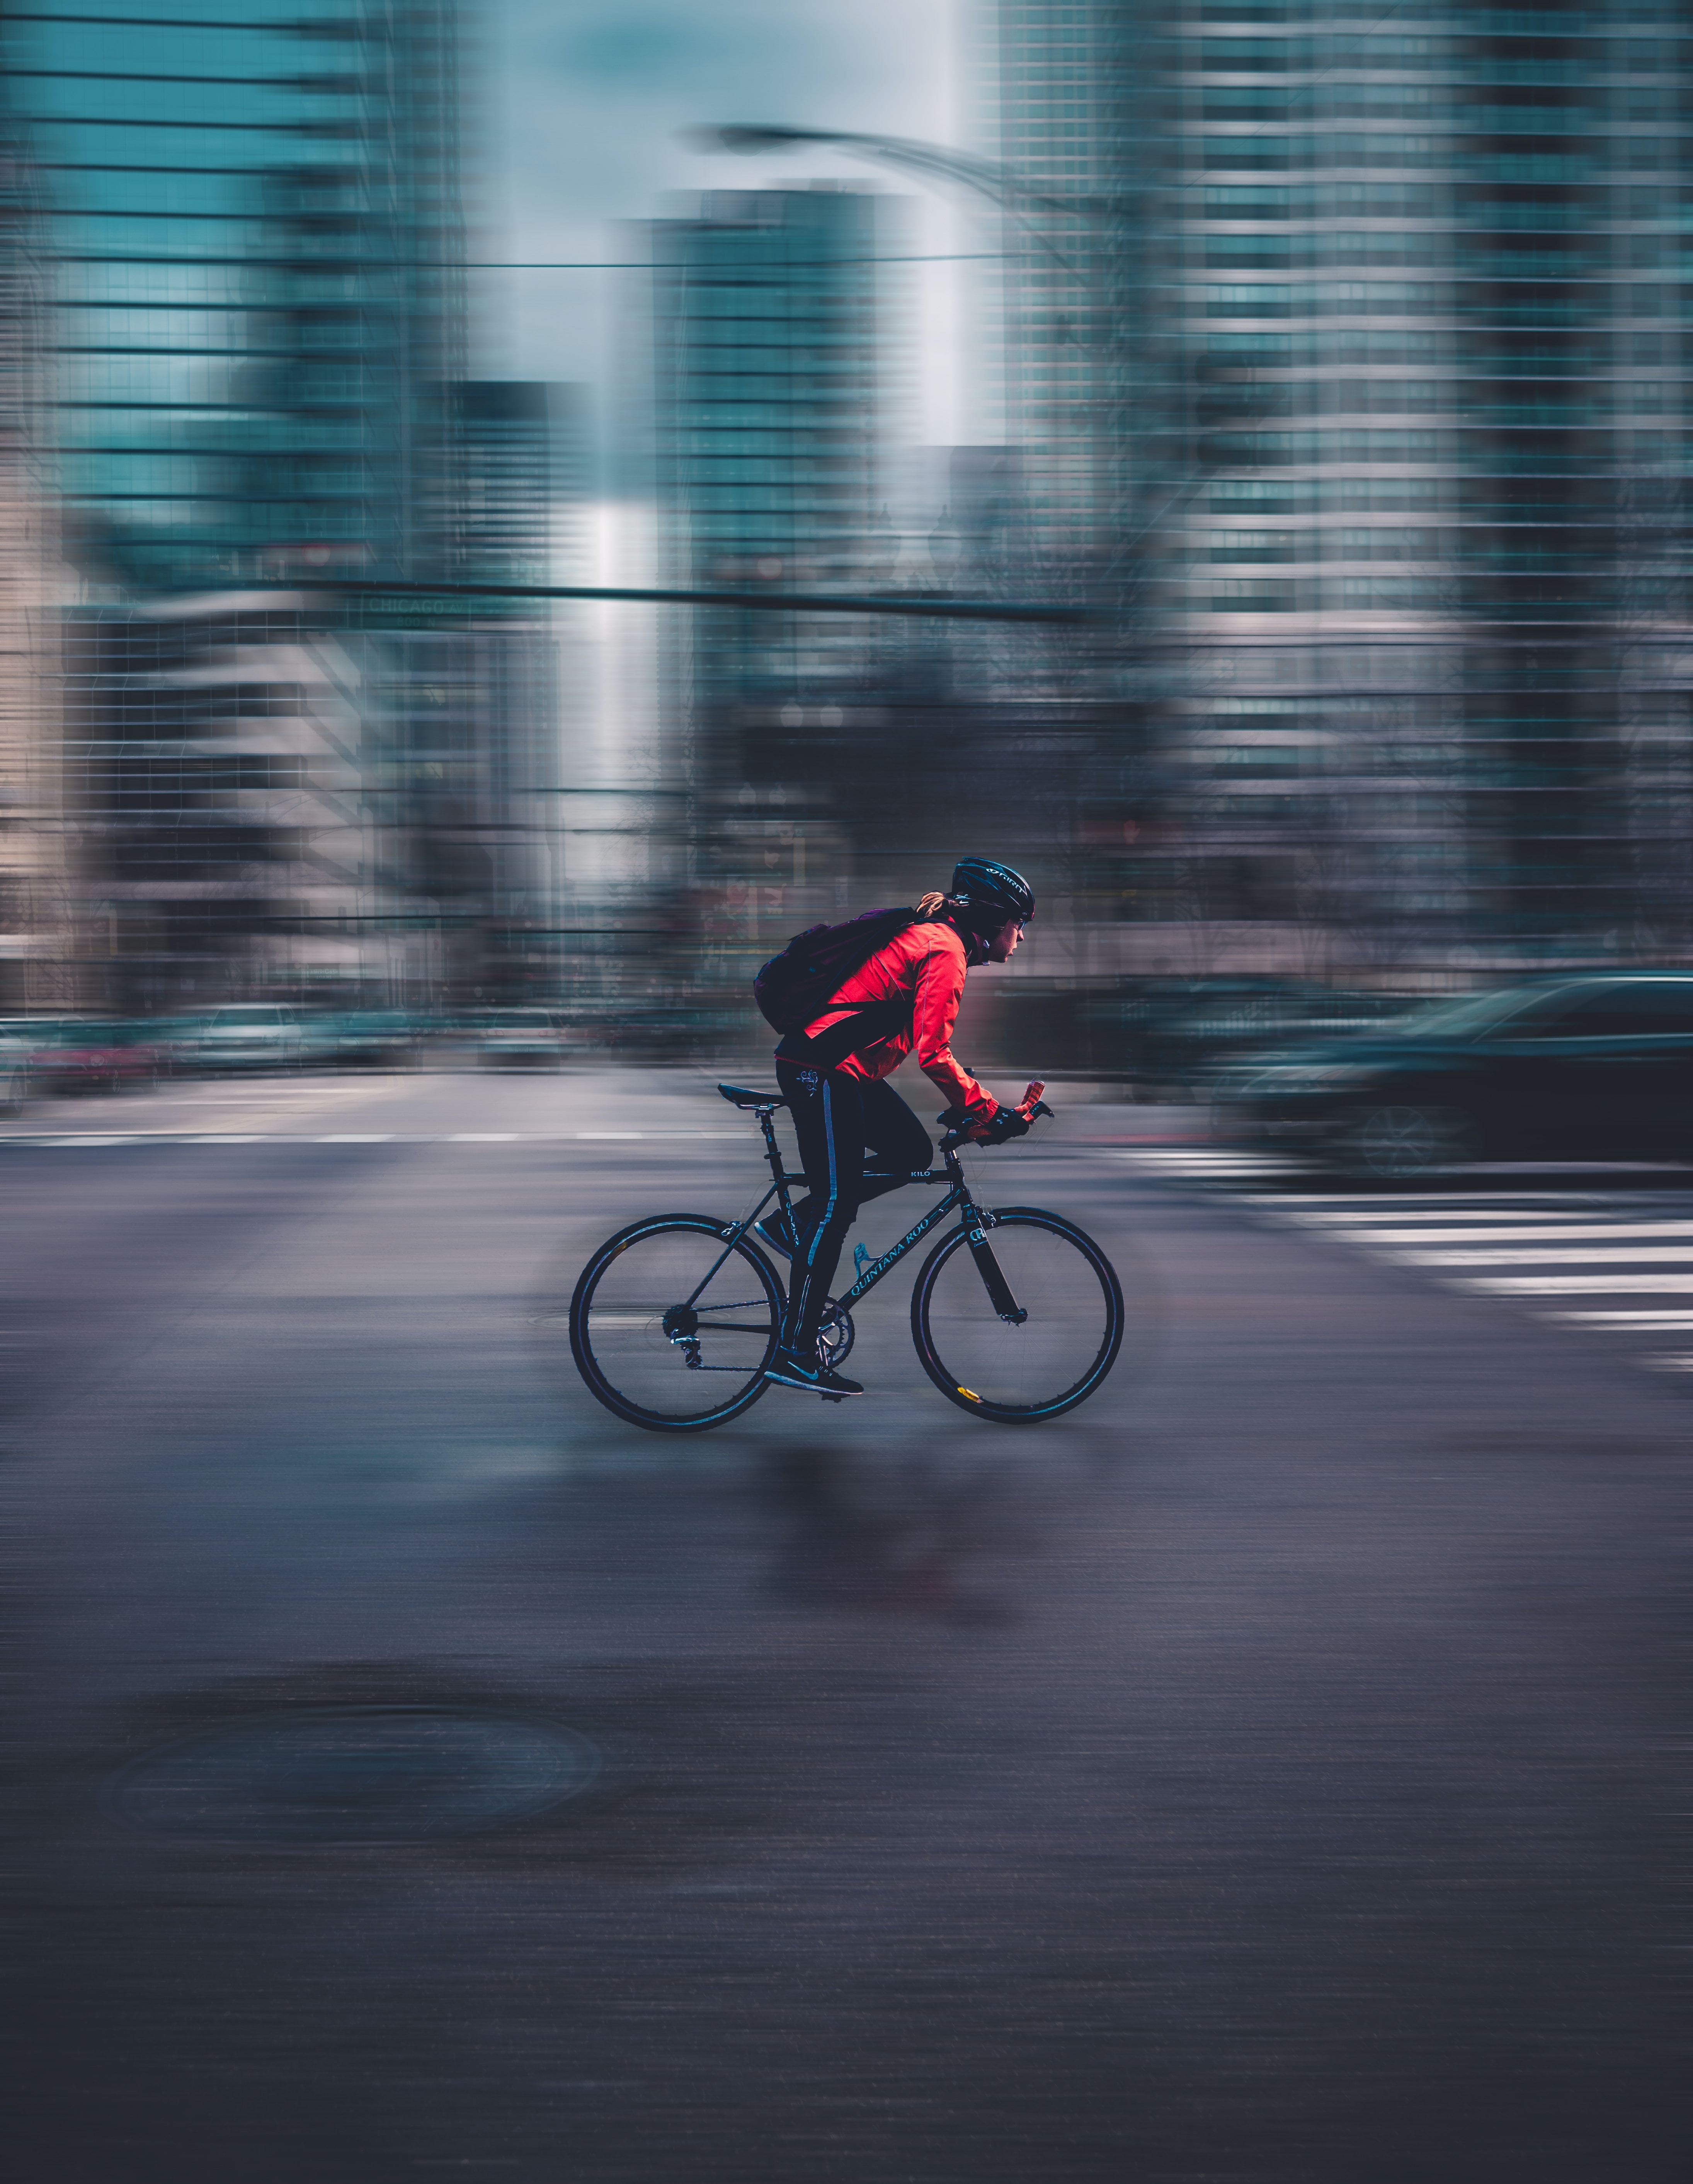
To take your timelapses to the next level, you'll want to experiment with motion blur. Motion blur occurs when the camera's shutter speed isn't fast enough to freeze all the movement in a scene. For timelapses, this can lead to magical effects that give a sense of flow and continuity.
The most straightforward way to introduce motion blur is to decrease your shutter speed. Most timelapses use a shutter speed of 1/2 to 1/5 of a second per frame, which freezes motion pretty well. Dropping down to 1/15, 1/8 or even 1/4 of a second will allow more movement within each frame. Start with small decreases and review your footage to see the impact. You can always go slower, but you can't undo too much blur!
Another technique is panning, where you slowly pan the camera during capture. This blurs the background but keeps foreground objects sharp, for a dramatic effect. Use a tripod and fluid head to smoothly pan across a scene. For the best results, pan at a rate of about 1 degree per second. Practice the motion before shooting.
You can also add motion blur in post-production using editing software. Apply a directional blur to mimic the effect of a slower shutter speed or panning. Add radial blur to simulate the look of spinning subjects. Use multiple layers and adjustment layers to control the amount and direction of blur for creative control.
With some experimentation, you'll be creating magical timelapses that move and flow. Motion blur is a simple technique, but the results can be mesmerizing. Slow down, pan around and blur to your heart's content - your viewers will thank you for it!
Technique #1: Pan & Zoom for a Cinematic Feel
To give your timelapse a professional, cinematic feel, try adding pan and zoom effects. This technique involves slowly panning (sliding) or zooming your camera during capture. When played back at high speed, it creates a dramatic sweeping or zooming motion.
To pan, place your camera on a sturdy tripod and loosen the head so you can smoothly slide it left or right. Start recording, then gently pan your camera in one direction. For zooming, use a zoom lens and slowly zoom in or out while recording. The key is to move steadily and smoothly. Any jerky or uneven movements will be exaggerated in the final timelapse.
You'll want to experiment to find the right speed. Subtle, gradual movements tend to work best. Shoot a test and review it at high speed to ensure the motion looks natural. If it's too fast, your audience may feel dizzy! For the most control, use a motorized pan/tilt head and a zoom lens with a zoom motor.
Pan and zoom is a simple technique that can take your timelapse to the next level. Use it to:
•Highlight key features or focal points in a scene.
•Follow the path of the sun or moon across the sky.
•Reveal details in a landscape.
•Add visual interest to relatively static subjects like city skylines.
With some practice, you'll be creating dramatic cinematic effects in no time. Your timelapses will become truly magical!
Technique #2: Capture Motion Trails With Long Exposure
To capture dramatic motion trails, use a long exposure technique. This means keeping your camera's shutter open for an extended period of time to allow more light in. The longer the shutter is open, the more blurred the motion will become.
Camera Settings
Set your camera to manual or shutter priority mode. Select a shutter speed of at least 1/4 second or slower - the slower the shutter, the more blurred the motion will be. Use a tripod to keep the camera steady since any camera shake will result in blurry photos at slow shutter speeds.
You'll also want to select a small aperture, around f/8 or higher, to ensure sharp focus on your subject. A small aperture means a larger depth of field, so more of the scene will be in focus. Adjust your ISO to a low setting, around 100 to 400, to avoid excess digital noise.
Consider Lighting Conditions
Long exposures work best in low light conditions, like at night or twilight. The less light, the slower the shutter speed you'll need to use to properly expose the image. Using a flash will likely be too bright and overpower the ambient light, so turn off your flash.
Artificial light sources, such as streetlights, spotlights or light painting can enhance long exposure shots by providing interesting trails of light. You can also introduce light sources into your scene for creative effects, like spinning glow sticks or flashlights.
Compose and Shoot
Compose your shot to include interesting subjects that will become blurred in motion, such as moving cars, cyclists or pedestrians. Press and hold the shutter button or use a cable release to open the shutter. Time the exposure to capture the motion effect you want. Exposures of 2 to 30 seconds are common for capturing dramatic motion trails.
With some experimentation, you'll be creating magical motion blurred scenes in no time. Using long exposure and creative light techniques adds extra wow-factor to your timelapses. Have fun and get out there shooting!
Technique #3: Add Light Trails for a Mystical Look
Adding light trails to your timelapse clips is an easy way to make them more dramatic and cinematic. As objects move through the frame, their lights will leave a trail of illumination behind them. This simple technique works best at night or in low light conditions.
To capture light trails in your timelapse:
Use a longer exposure
The key is using a shutter speed slow enough to capture the movement of the lights. Start with a 2 to 5 second exposure and adjust from there based on the speed of your subject’s movement. You want the trails to be prominent but not completely blur out the lights.
Shoot in low light or at night
Less ambient light means the light trails will be more visible. Nighttime city scenes, traffic, or illuminated subjects are perfect for this technique.
Use a stationary camera
For the light trails to register clearly, your camera needs to remain still during the long exposure. Use a tripod to keep the camera steady. Any movement will result in blurry and uneven light trails.
Consider using neutral density filters
ND filters reduce the amount of light entering your lens so you can achieve longer shutter speeds, even in bright conditions. They come in different strengths to suit your needs. ND filters give you more flexibility to shoot light trails any time of day.
Experiment with different subjects
Cars, busses, trains, ferries, etc. moving through the frame will all create unique light trails. Try shooting roadways, harbors, amusement park rides or anywhere vehicles and lights are in motion. Get creative with how the lines of light interact with the environment.
With some experimentation, you’ll be creating eye-catching light trail effects in your timelapses in no time. The results can be truly magical! Let your viewers follow the journey of illuminated subjects as they move through the night.
Technique #4: Experiment With Zoom Bursts for an Energetic Style
Experimenting with zoom bursts is a great way to add energy and excitement to your timelapse sequences. As the name suggests, a zoom burst is when you quickly zoom in or out during a shot. When played back at high speed in your timelapse, this creates a dramatic effect.
To get started, set up your timelapse as usual and start recording. Keep your focal point centered in the frame. After a few seconds of recording, quickly zoom in or out. For the most dramatic results, zoom in from a wide shot to a tight frame, or zoom out from a tight frame to a wide shot. Hold the zoomed-in or zoomed-out frame for a few seconds, then zoom back to your original focal point.
You can also get creative by:
Zooming in and out multiple times in one shot for a pulsing effect.
Zooming in one direction, then reversing and zooming out the other direction.
Combining zoom bursts with camera movement like pans, tilts or slides for an energized sequence.
Zooming at different speeds - start slowly, build up speed, then slow down again.
Zooming while recording subjects that contain a lot of motion or action. The combination of zooming and subject movement will make your timelapse really come alive.
A zoom burst only needs to last 2 to 3 seconds to be effective, so keep your bursts short and spread them out over the course of your recording. This technique works best when you have a camera with a smooth zoom ring or motorized zoom control. Practice the move a few times to get the hang of starting and stopping the zoom at the right points.
With some experimentation, zoom bursts can become a go-to technique to take your timelapses to the next level. Short, dramatic bursts are all you need to create an energetic and compelling sequence that will captivate your viewers. Get out and start recording - the possibilities for motion and zoom are endless!
Conclusion
So now you have all the knowledge and tools to get creative with motion blur in your timelapses. Play around with different shutter speeds, pans, zooms and camera movements to achieve the effect you want. Don't be afraid to experiment - you can always delete and reshoot. The key is practice and learning from your mistakes. Once you master the techniques, motion blur can become a fun creative outlet to make your timelapses even more dynamic and visually interesting. Now get out there, set up your camera and see what kind of motion blur magic you can create! The possibilities are endless.
Subscribe to our newsletter
Get a weekly tech digest: podcast episodes, tips, and resources delivered straight to your inbox.
Other episodes you may like
Episode notes
Subscribe to our newsletter
Get a weekly tech digest: podcast episodes, tips, and resources delivered straight to your inbox.
Other episodes you may like
Episode notes
Subscribe to our newsletter
Get a weekly tech digest: podcast episodes, tips, and resources delivered straight to your inbox.


